
 When it comes to camping and backpacking, having the right gear can make all the difference. From hammock quilts to hammocks and accessories, Arrowhead Equipment has everything you need for your next outdoor adventure. And the best part? All of our products are proudly made in the USA. Located in Southern Idaho, Arrowhead Equipment is dedicated to providing high-quality gear for campers and backpackers. All of our sewn and spliced items are built in our shop by skilled craftsmen who take pride in their work. We believe in supporting American manufacturing, which is why we source many of our components from Made in America manufacturers. This includes all of our fabrics and insulations for our hammock quilts, hammocks, and accessories. By using materials sourced from American manufacturers, we can ensure that our products are of the highest quality while also supporting American jobs and businesses. Plus, we can guarantee that our products are made with the utmost care and attention to detail. At Arrowhead Equipment, we understand that camping and backpacking gear needs to be durable, lightweight, and functional. That's why we use only the best materials and construction methods to ensure that our products can stand up to the rigors of the great outdoors. Whether you're planning a weekend camping trip or a multi-day backpacking excursion, Arrowhead Equipment has everything you need to make your adventure a success. From our cozy hammock quilts to our sturdy and reliable hammocks and accessories, you can trust us to provide the best gear for your needs. So if you're looking for camping and backpacking gear that is proudly made in the USA, look no further than Arrowhead Equipment. We're committed to providing the highest quality products and supporting American manufacturing, so you can feel good about your purchase knowing that you're supporting American jobs and businesses. 
0 Comments
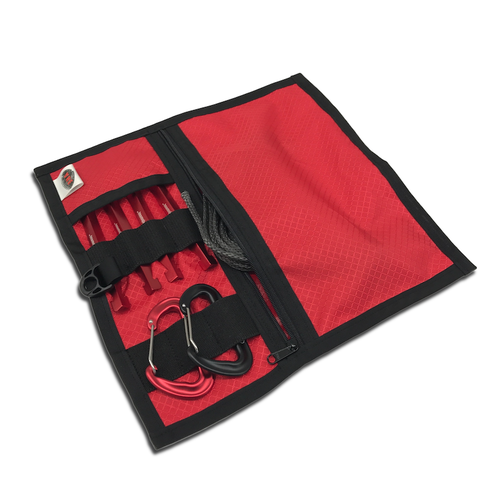
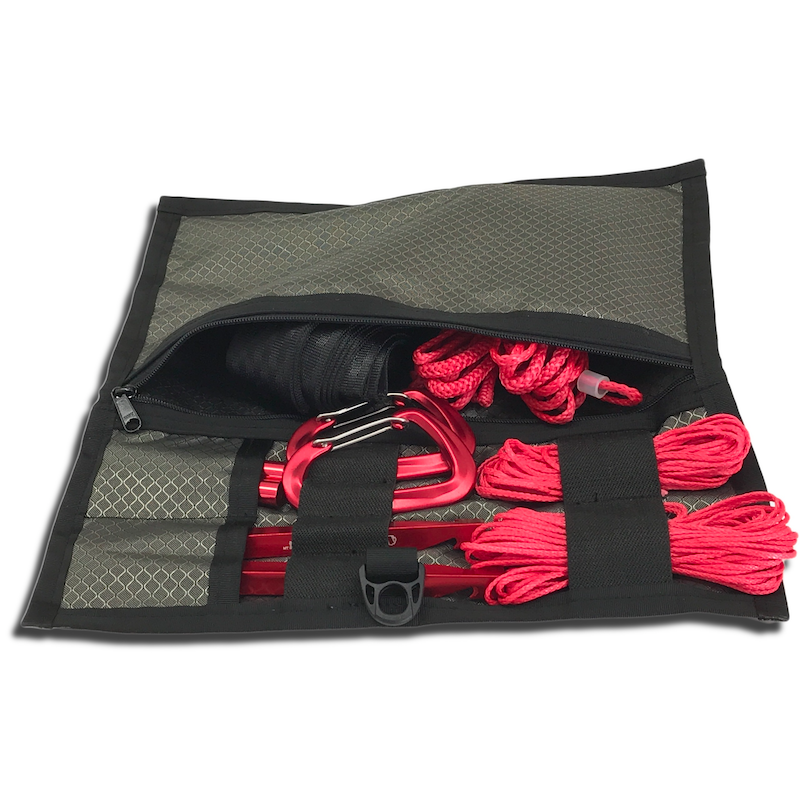
 Photo by Esther Tuttle on Unsplash Are you an avid camper who is looking for a way to upgrade your camping experience? Look no further than Arrowhead Equipment's camping hammocks! With Arrowhead Equipment's hammocks, you can experience the camping experience of your dreams. Whether you're a beginner camper or an experienced outdoorsman, Arrowhead Equipment's camping hammocks are sure to take your camping trips to the next level. Introduction to Camping Hammocks Camping hammocks are a great way to get out and experience nature in a new way. They are lightweight, durable, and easy to set up, making them the perfect addition to any camping trip. They provide a comfortable and secure way to sleep while camping and can be used in a variety of different locations, from the woods to the beach. Camping hammocks are perfect for solo camping trips or for couples looking to share an intimate camping experience. Benefits of Camping with a Hammock There are many benefits to camping with a hammock. Unlike traditional tents, hammocks are lightweight and easy to transport, meaning that you can take them with you wherever you go. They are also more comfortable to sleep in than a tent, as the hammock’s suspension system will cradle you and provide superior support. Furthermore, hammocks allow you to sleep under the stars, creating a unique and unforgettable camping experience. Types of Camping Hammocks When it comes to camping hammocks, there are several different types to choose from. The most common type is the traditional Gathered end hammock. Made with a bed of ripstop nylon, and gathered suspension connection at the ends. These hammocks are lightweight and easy to set up, making them perfect for camping trips. Finally, camping hammocks also come in a variety of different lengths and widths. From 9 feet for younger users to 12 feet long for even the tallest hiker. Camping Hammock Safety Tips Just like with any outdoor activity, there are certain safety precautions that should be taken when camping with a hammock. Always make sure that your hammock is securely attached to two sturdy trees or poles, and that it is properly tensioned. Furthermore, never use damaged or frayed ropes or strings, as these can lead to injuries. Always check your trees to be sure they are healthy with no dead or hanging branches. Additionally, make sure to check your hammock before and after each use for tears or damage. How to Choose the Right Camping Hammock When choosing the right camping hammock, there are several factors to consider. First, determine the size of the hammock that you need. Our 9-foot hammocks fit children, but anyone over 5 feet tall should consider longer hammocks for greater comfort. Next, consider the type of hammock that you want. If you plan on going camping in the woods, a gathered-end hammock is a perfect choice. Finally, consider the materials that your hammock is made from. Generally speaking, nylon and cotton are the two most popular materials used in camping hammocks. Nylon is lightweight and durable, while cotton is soft and comfortable. Advantages of Arrowhead Equipment's Camping Hammocks Arrowhead Equipment is dedicated to providing campers with the highest-quality camping hammocks on the market. Our hammocks are made from durable materials and are designed to last. Furthermore, they offer a variety of different sizes and styles, meaning that there’s sure to be a hammock that fits your needs. Finally, Arrowhead Equipment's hammocks are affordable, making them an excellent option for budget-conscious campers. Tips for Setting up an Arrowhead Equipment Camping Hammock Setting up an Arrowhead Equipment camping hammock is quick and easy. First, choose two sturdy trees or poles that are roughly the same distance apart. Next, attach the hammock to the trees or poles using the included straps. Finally, tension the straps to ensure that the hammock is securely attached and that it is tensioned. 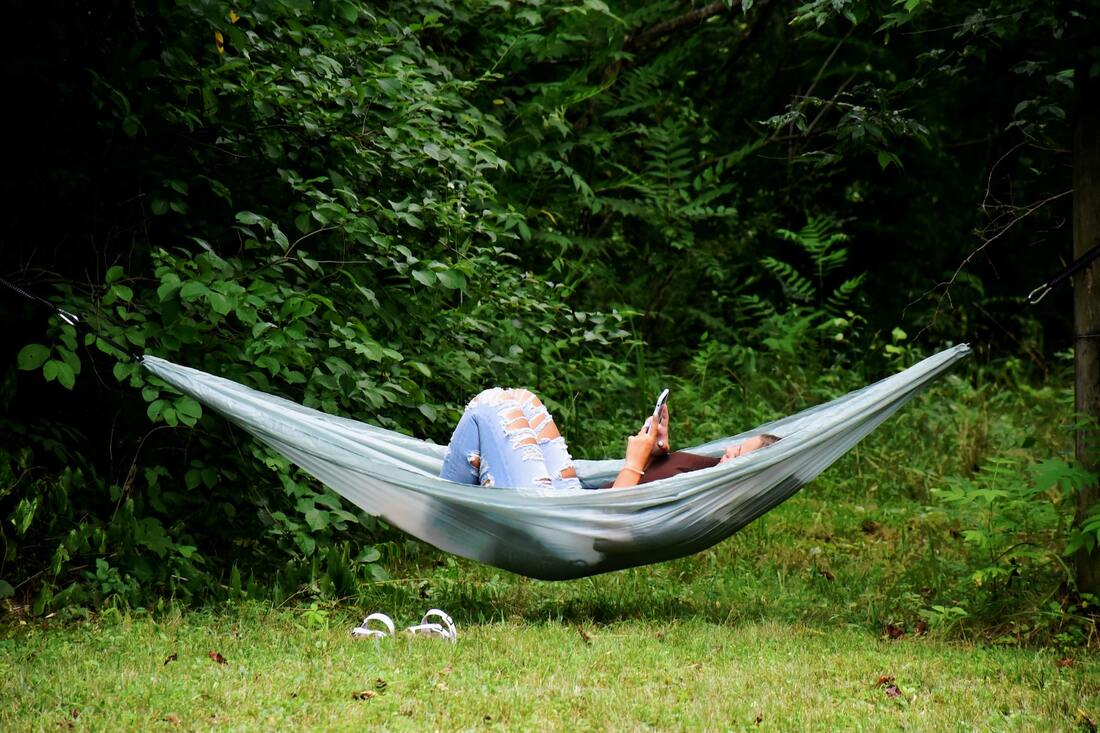 Photo by Emily Camp on Unsplash Fun Activities to Enjoy While Camping with an Arrowhead Equipment Hammock Camping with a hammock is a great way to enjoy the outdoors and have fun with family and friends. Whether you’re looking for a relaxing afternoon or an adrenaline-filled adventure, there are plenty of activities that you can enjoy while camping with a hammock. For a relaxing afternoon, try star-gazing or fishing. If you’re looking for a more active adventure, try hiking or kayaking. You can also take advantage of the hammock and enjoy a picnic lunch or read a book while swinging in the hammock. Camping Hammock Accessories For the ultimate camping experience, you’ll want to make sure that you have all the necessary accessories for your hammock. From rain tarps to mosquito nets, there are a variety of accessories that you can use to make your camping experience more comfortable and enjoyable. Be sure to consider insulation for your hammock to keep warm throughout the night. An Underquilt and Top Quilt combination maximizes the comfort of the hammock. Camping with a hammock is a great way to enjoy the outdoors and experience nature in a unique and exciting way. With Arrowhead Equipment's hammocks, you can take your camping experience to the next level. Arrowhead Equipment's hammocks are lightweight, durable, and affordable, and they offer a variety of different styles and sizes to fit your needs. Furthermore, our hammocks are easy to set up and provide a comfortable and secure way to sleep while camping. So, what are you waiting for? Get out there and experience the magic of camping with Arrowhead Equipment's hammocks! It's time to get organized |

| Many stress about seam sealing their tarps...How, where, how long will it take are all questions that many face when considering sealing their hammock camping tarp. First off, don't stress. Seam sealing is not something to be very concerned about. It's a pretty easy process and should only take 20-30 minutes of work. | 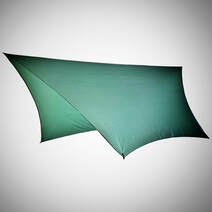 |
Let's Break it down into several easy steps.
1. Choose a spot to do the seam sealing. The best option is a location that is flat, level, will get good air flow and be warm....60-80 degrees. It will be a spot where you can leave the tarp spread out for 6-24 hours undisturbed. If at all possible having a location where the tarp can be either set up or laid flat. Here in the shop, we use our 12-foot long x 7-foot wide cutting table. But assuming you don't have a table that large laying the tarp flat on a smooth floor will work. Some batches of silicone can have a strong smell if setting up indoors have some way to vent the smell...it will dissipate as the silicone cures but being able to open a window or crack an exterior door for a couple of hours is a good idea.
1. Choose a spot to do the seam sealing. The best option is a location that is flat, level, will get good air flow and be warm....60-80 degrees. It will be a spot where you can leave the tarp spread out for 6-24 hours undisturbed. If at all possible having a location where the tarp can be either set up or laid flat. Here in the shop, we use our 12-foot long x 7-foot wide cutting table. But assuming you don't have a table that large laying the tarp flat on a smooth floor will work. Some batches of silicone can have a strong smell if setting up indoors have some way to vent the smell...it will dissipate as the silicone cures but being able to open a window or crack an exterior door for a couple of hours is a good idea.
| 2. You will need a quality seam sealer to apply. We only use McNett Seam Grip + SIL to seal tarps in the shop and it's the only product we sell and recommend to use on our tarps. It's high-quality silicone that cures fairly quickly with minimal tackiness. It's formulated to self-level if you get it a little thick but no run everywhere. |
3. Add tension to the tarp. We use weights at each corner of the tarp to pull out the ridgeline and guy out points to stretch the tarp tightly. If you are pitching the tarp with guylines and stakes pull it out tight. This does a couple of things for you. First, you want to take any stretch the tarp has to its max....if the tarp is relaxed you will be stretching the sealer when you hang it on trips. This can cause the sealer to wear off faster with use. And second, it will open up the stitching holes in the tarps sewing...you want the sealer to penetrate into the stitching to seal these small holes around the tread up. In the shop, we use hand weights attached to the Ridgeline and tie out points to stretch the tarp over our table.
| 4. Applying the sealer is best done with a foam brush...a small stiff bristled brush is included with the Seam Grip package but we find it is a bit small and cumbersome compared to using a foam brush. With the foam brush, you are able to get cleaner lines and it will spread the silicone in a smooth even coat. 5. Gather some paper towels. You will want some handy to clean up any drips or runs that you might have. It can also be hand to have a spot to set down the brush and tube of SIL as you work along sections. |
6. With all of your supplies gathered and your tarp tensioned it's time to seal the seams and any panel pull tie out points. First, remove the cap from the SIL tube and using a fine pointed knife poke the sealed end with a small hole...no need to cut in a large opening. You want to work with a small amount of sealer at a time. Starting with the ridgeline squeeze a small bead along a couple of feet (what you can easily reach without moving) re-cap the tube and set it aside. Take the brush and smooth along the bead in long brush strokes. Work back and forth along the tarp's ridgeline smoothing the sealer along the width until you have coated the full ridge and have soothed the sealer in both directions. This helps to ensure that the sealer penetrates into the stitching holes and around the edges ridgeline. Reposition yourself and your paper towels as needed. For Panel pulls cover the full patch and any stitching with a generous coating and brush it smooth, working the sealer over the stitching in multiple directions to work it in as best you can. Once you have coated everything take a look along the length from close to the tarp perspective. This can help to spot any areas that may need more or were missed by catching the light along the sealer.
7. Clean up. Use your paper towels to clean up any drips. Rub across the fabric with firm pressure, moving to a clean section of the towel as needed. If you squeeze some paper towels around the foam brush you will extract most of the silicone from the brush and be able to use it again...be it for touch up or another tarp. Cap the Silicone tightly and squeeze the remainder to one end just like with a tube of toothpaste.

7. Once you have applied sealer to all of the ridgeline and any pullouts it's time to let it cure. A small amount of air flow will help the silicone to cure much faster so if your setting up indoors open a window or set out a small fan. Let the tarp sit for 6-8 hours before trying to move it...longer if possible. We like to leave them set with tension and good air flow overnight whenever possible.
And that's it. You have seam sealed your hammock camping tarp and it's now ready for your next trip.
AHE Crew
Whats up at AHE, What Happening is our mini Blog about the day to day things that we are working on. Check back Frequently for updates, In Stock items, Specials, Trip Plans (yes that you can join us on) and what ever else pops up.
Archives
January 2024
January 2023
November 2022
July 2019
March 2019
December 2018
November 2018
October 2018
September 2018
August 2018
July 2018
November 2017
February 2017
January 2017
May 2016
January 2016
October 2015
July 2015
April 2015
February 2015
November 2014
October 2014
June 2014
October 2013
September 2013
August 2013
July 2013
May 2013
April 2013
March 2013
February 2013
January 2013
December 2012
November 2012
 RSS Feed