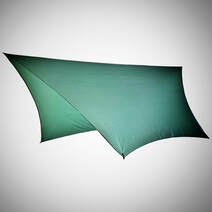
Let's Break it down into several easy steps. 1. Choose a spot to do the seam sealing. The best option is a location that is flat, level, will get good air flow and be warm....60-80 degrees. It will be a spot where you can leave the tarp spread out for 6-24 hours undisturbed. If at all possible having a location where the tarp can be either set up or laid flat. Here in the shop, we use our 12-foot long x 7-foot wide cutting table. But assuming you don't have a table that large laying the tarp flat on a smooth floor will work. Some batches of silicone can have a strong smell if setting up indoors have some way to vent the smell...it will dissipate as the silicone cures but being able to open a window or crack an exterior door for a couple of hours is a good idea.
3. Add tension to the tarp. We use weights at each corner of the tarp to pull out the ridgeline and guy out points to stretch the tarp tightly. If you are pitching the tarp with guylines and stakes pull it out tight. This does a couple of things for you. First, you want to take any stretch the tarp has to its max....if the tarp is relaxed you will be stretching the sealer when you hang it on trips. This can cause the sealer to wear off faster with use. And second, it will open up the stitching holes in the tarps sewing...you want the sealer to penetrate into the stitching to seal these small holes around the tread up. In the shop, we use hand weights attached to the Ridgeline and tie out points to stretch the tarp over our table.
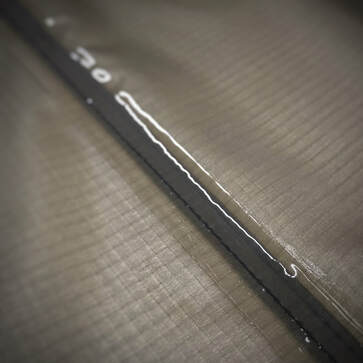
6. With all of your supplies gathered and your tarp tensioned it's time to seal the seams and any panel pull tie out points. First, remove the cap from the SIL tube and using a fine pointed knife poke the sealed end with a small hole...no need to cut in a large opening. You want to work with a small amount of sealer at a time. Starting with the ridgeline squeeze a small bead along a couple of feet (what you can easily reach without moving) re-cap the tube and set it aside. Take the brush and smooth along the bead in long brush strokes. Work back and forth along the tarp's ridgeline smoothing the sealer along the width until you have coated the full ridge and have soothed the sealer in both directions. This helps to ensure that the sealer penetrates into the stitching holes and around the edges ridgeline. Reposition yourself and your paper towels as needed. For Panel pulls cover the full patch and any stitching with a generous coating and brush it smooth, working the sealer over the stitching in multiple directions to work it in as best you can. Once you have coated everything take a look along the length from close to the tarp perspective. This can help to spot any areas that may need more or were missed by catching the light along the sealer. 7. Clean up. Use your paper towels to clean up any drips. Rub across the fabric with firm pressure, moving to a clean section of the towel as needed. If you squeeze some paper towels around the foam brush you will extract most of the silicone from the brush and be able to use it again...be it for touch up or another tarp. Cap the Silicone tightly and squeeze the remainder to one end just like with a tube of toothpaste. 7. Once you have applied sealer to all of the ridgeline and any pullouts it's time to let it cure. A small amount of air flow will help the silicone to cure much faster so if your setting up indoors open a window or set out a small fan. Let the tarp sit for 6-8 hours before trying to move it...longer if possible. We like to leave them set with tension and good air flow overnight whenever possible. And that's it. You have seam sealed your hammock camping tarp and it's now ready for your next trip.
2 Comments
|
AHE CrewWhats up at AHE, What Happening is our mini Blog about the day to day things that we are working on. Check back Frequently for updates, In Stock items, Specials, Trip Plans (yes that you can join us on) and what ever else pops up. Archives
January 2024
Categories |
Copyright © 2024


 RSS Feed